Using the desktop client
Installation
We offer a large number of supported operating systems for the usage of the polybox service.
Please follow the installation instructions in this manual, according to your operating system.
Current polybox Sync Client version: 5.2.1
Windows
You can download the Windows installer by clicking on the following link: Windows Sync Client
You can start the installation process by double clicking on the downloaded installation file (polybox-*.msi).
Click through the installation process and enter your ETH user name and your corresponding password for web application (LDAP) in the login step within the configuration process.
If the connection with the polybox servers is successful, you can setup your synchronization and choose what you want to synchronize and with which local folder (default: “everything” synchronized with the folder “C:\Users\Username\polybox”).
Mac OS X
You can download the OS X installer by clicking on the following link: OS X Sync Client
You can start the installation process by double clicking on the downloaded installation file (polybox-*.pkg).
Click through the installation process and enter your ETH user name and your corresponding password for web application (LDAP) in the login step within the configuration process.
If the connection with the polybox servers is successful, you can setup your synchronization and choose what you want to synchronize and with which local folder (default: “everything” synchronized with the folder “/Users/username/polybox”).
Linux
The following Linux distributions are supported: CentOS/RHEL, Debian, Fedora, openSUSE & Ubuntu.
Select your distribution under the following link and add the appropriate repository for your operating system like described there: OwnCloud Linux Repository
Please note that the Linux Sync Clients are OwnCloud Sync Clients. These are the same clients as those of polybox itself. The only difference is that you have to manually enter the path to the server (https://polybox.ethz.ch) during the configuration process.
You can start the OwnCloud Sync Client after you added the reporitory and installed the “owncloud-client” package.
Click through the installation process and enter your ETH user name and your corresponding password for web application (LDAP) in the login step within the configuration process.
If the connection with the polybox servers is successful, you can setup your synchronization and choose what you want to synchronize and with which local folder (default: “everything” synchronized with the folder “/home/username/owncloud”).
Overview Sync Client Functionalities
You can open the Sync Client by using the icon on the taskbar to configure your Sync Client or view error messages.
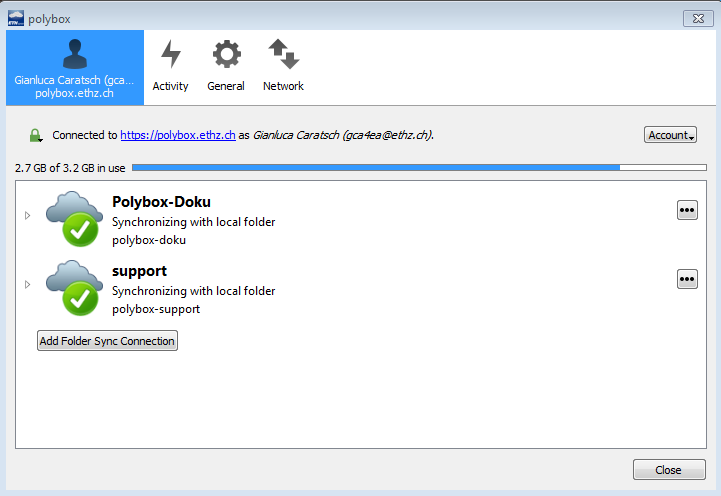
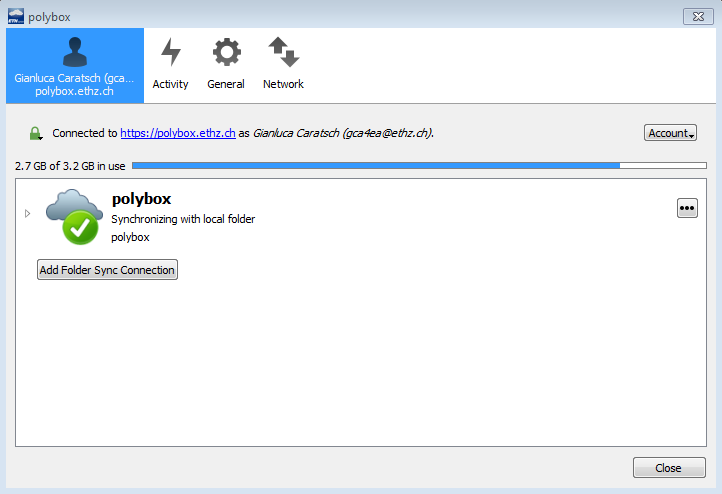
Selecting the user tab will get you the information on how much storage space you have left and what directories you are currently synchronizing. Here you can also select the polybox directories and the local directories on your computer that you want to synchronize.
You can view the history of your uploaded and downloaded files by selecting the “Activity” tab. Error messages can also be find here under the “Not Synced” tab. Please note that the history is wiped every time you close the client or restart your computer.
In the section “General” you are able to specify if the Sync Client should be launched at system startup or not and if you want to get notifications on your desktop. Here you also find the current Sync Client version.
The “Network” tab gives you the possibility to configure a proxy to be used or to limit the speed of your Sync Client. This can be useful if your system starts to have performance issues or you need to limit the internet bandwith.
Folder Synchronization
The Sync Client allows you to synchronize specific parts of your polybox directory with different local directories on your computer. This can be useful, when you use your polybox account for multiple purposes on different machines. This feature for examples helps you if you want to synchronize data for teaching only with your personal computer and research data only with the computer in your office.
Local directories can be added in the user tab by clicking on “Add Folder Sync Connection”. Here you can specify which folders of your polybox directory should be synchronized with a local folder on your computer.
Folders created this way will be displayed as synchronization directories (you will see multiple cloud symbols with the configured names). These directories can by customized at any time.
To pause the synchronization of one specific directory, select the directory and click on “Pause Sync”.
To remove the synchronizatoin of one specific directory, select the directory and click on “Remove Folder Sync Connection”. This will not delete any data on you computer or in your polybox directory, but only end synchronization from this point on.
To customize which parts of your polybox directory should be syncrhonized, you can click on “Choose What To Sync”.